How are holographic stickers made?
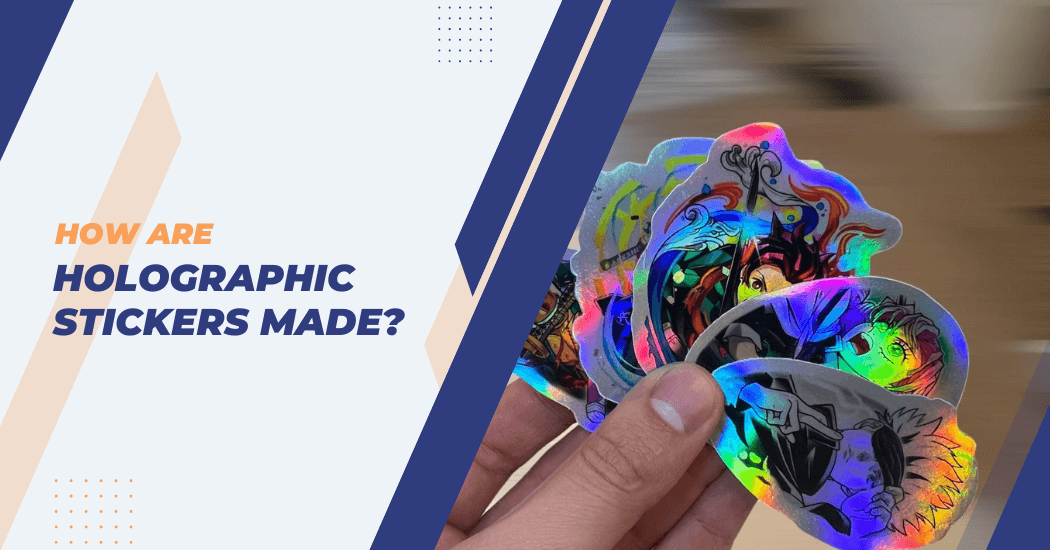
Holographic stickers have become ubiquitous in modern society, adorning everything from product packaging to official documents as a mark of authenticity and security.
These mesmerizing stickers, often seen shimmering with iridescent colors and intricate designs, are created through a fascinating process known as holography.
In this article, we delve into holographic sticker production, exploring the technology behind it, materials involved and the steps taken to craft these captivating security features. Join us on this journey as we unravel the secrets behind the creation of holographic stickers.
What is holographic?
Holography is a technique that allows the recording and reproduction of three-dimensional images. It was first invented in 1947 by Hungarian-British physicist Dennis Gabor, who won the Nobel Prize in Physics for his work on holography in 1971.
Unlike traditional photography, which captures light from a single view, holography records the interference patterns created by light waves reflected off an object from different angles.
This allows for the reconstruction of a 3D image when the hologram is viewed under proper lighting conditions, giving the illusion of depth and dimensionality.
Material and tools needed in holographic
Process of creating holographic stickers involves specialized materials and tools to produce the desired effect. These include:
- Laser: A laser beam is used to produce a coherent light source for the creation of holograms.
- Holographic film or plate: This is a specialized material that records the interference patterns created by the reflected laser light. It comes in various thicknesses and can be transparent or diffusive.
- Photosensitive chemicals: These are substances used to coat the holographic film or plate, allowing it to record the interference patterns.
- Master hologram: This is a high-quality original hologram used as a template for mass production.
- Embossing machine: In the final step, an embossing machine stamps the holographic design onto adhesive material, creating the unique and captivating look of holographic stickers.
Making Process of Holographic Stickers
1) Design Phase
- Conceptualization and design considerations: Initial step in the creation of a holographic sticker begins with the conceptualization phase. It’s crucial to consider the sticker’s end use whether for security, branding or decorative purposes as this influences the design complexity and security features. Factors such as visibility under different light conditions and the sticker’s size also play pivotal roles in the design process.
- Computer-aided design (CAD) software utilization: Designers employ CAD software to bring their holographic visions to life. These powerful tools allow for the precise creation and manipulation of intricate patterns and visual elements that define the hologram. CAD software ensures that designs are both aesthetically captivating and technically feasible for production.
- Selection of visual elements and patterns for the holographic effect: Choice of visual elements and patterns is instrumental in achieving the desired holographic effect. Designers often opt for elements that maximize the unique depth, movement and light-refracting properties of holograms. This might include geometric patterns, kinetic elements or three-dimensional illusions that change appearance at different angles.
2) Holographic Printing Techniques
- Embossing: Most traditional method of creating holographic stickers involves embossing. In this process, a master hologram is created and used to stamp the design onto foil or other adhesive material. This produces a tactile effect on the sticker’s surface, making it difficult to replicate.
- Photopolymer: A more modern method, photopolymer printing utilizes photosensitive chemicals that are exposed to a master hologram, creating a replica of the original. This method allows for faster production and is often used for larger quantities.
- Dot-matrix: This technique involves breaking down the holographic design into tiny dots that are then printed onto the adhesive material using specialized equipment. It produces a pixelated effect, giving off a 3D illusion when viewed under proper lighting conditions.
- Laminating: Similar to the dot-matrix technique, laminating involves layering a holographic film onto an adhesive material, creating a seamless and durable design. This method is often used for smaller production runs or specialized designs.
3) Production Process
A. Preparation of Materials
- Holographic film selection: First step in the production process involves choosing the right holographic film, which will serve as the base for the holographic stickers. This decision is crucial as the film’s properties determine the sticker’s overall appearance and functionality.
- Substrate preparation (paper, vinyl, etc.): Concurrently, the substrate material such as paper or vinyl is prepared. This involves ensuring the material is clean, properly sized and suitable for adhesive application, as it will hold the holographic elements.
B. Printing
The holographic elements are meticulously introduced onto the prepared substrate through one of the aforementioned techniques, such as embossing or photopolymer printing.
Throughout this phase, rigorous quality control measures are in place to ensure that every print meets the highest standards of clarity, color and placement.
C. Cutting and Finishing
- Die-cutting: After printing, the substrate material is fed into a specialized machine that cuts out the desired shape and size of each sticker. This process ensures uniformity and precision.
- Laser cutting of stickers: In cases where highly intricate designs are required, laser cutting is utilized to achieve the desired level of detail. This process also allows for faster production and higher levels of customization.
- Laminating: In case of laminated stickers, the holographic film is applied onto the adhesive material using heat and pressure. This step also adds an extra layer of protection to make the durable stickers.
4) Quality Control and Security Measures
To ensure the authenticity and security of holographic stickers, strict quality control measures are put in place throughout the production process. These include:
- Inspection of raw materials: Any flaws or defects in the base material can affect the final product’s quality, making it crucial to inspect all raw materials before use.
- Testing for light reflection and refraction properties: Holographic stickers rely on light to create their distinctive effect, making it essential to test for proper light reflection and refraction.
- Verification of security features: Additional security features, such as hidden images or microtext, are inspected and verified to ensure they are correctly incorporated into the design.
- Serial number generation: Unique serial numbers can be added to each holographic sticker for authentication and tracking purposes.
- Tamper-evident features: Holographic stickers can also include tamper-evident features such as cut-out patterns or adhesive options that make it difficult for the sticker to be removed without damage.
Advanced techniques and innovations
As technology continues to advance, new techniques and innovations in holographic printing have emerged. These include:
- Multi-layered holograms: By layering multiple holographic films with varying properties, designers can create more complex and dynamic holographic effects.
- Motion-sensing technology: Some holographic stickers now come equipped with motion-sensing technology, allowing them to change appearance when moved or tilted.
- Smartphone interactivity: With the use of specialized apps, certain holographic stickers can now be scanned by smartphones to reveal hidden elements and additional information.
- Holographic displays: Advancements in technology have also made it possible to create larger holographic displays for advertising and entertainment purposes. These displays project a three-dimensional image that can be viewed from multiple angles, giving the illusion of an object floating in mid-air.
Tips for making holographic stickers
- Choose the right base material: The type of material used can greatly affect the appearance and durability of holographic stickers. Make sure to choose a high-quality, adhesive-friendly material.
- Consider the lighting conditions: To achieve the full effect of holographic stickers, proper lighting is essential. Keep in mind where and how the stickers will be displayed when designing them.
- Experiment with different techniques: Use a combination of techniques like dot-matrix and embossing to create unique and eye-catching designs.
- Utilize security features: Incorporating additional security features, such as hidden images or serial numbers, can add an extra layer of protection against counterfeiting.
Common challenges & their solutions
- Wrinkling or bubbling of the holographic film: This can be avoided by ensuring the substrate material is clean and properly prepared before applying the film.
- Poor light reflection or refraction: This may occur if the chosen holographic film does not have suitable properties for the desired effect. Choosing a different film or adjusting the design can help solve this issue.
- Difficulty in cutting intricate designs: Laser cutting or using specialized die-cutting equipment can help achieve precision and accuracy for complex designs.
- Misalignment of holographic elements: This can be avoided by carefully setting up the printing process and regularly checking for alignment during production.
Final words
Holographic stickers are crafted through a meticulous process involving holography, embossing and metallization techniques.
By following the step-by-step guide outlined above, you can create high-quality holographic stickers with precision and clarity. We hope this comprehensive overview serves as a valuable resource, empowering you to produce captivating holographic stickers for various applications.
